How to Draw a Easy Obstacle Course
15 ways to improve your character animation
For as long as humans have crawled upon the surface of the earth we have held a fascinated with art and motion. Early cave drawings show that even primitive man would try to give the illusion of movement by posing the limbs on their animal sketches.
Fast forward to the 1800s and even before the invention of the motion picture camera, Edward Muybridge was using photographs taken sequentially to help study human and animal motion, images which are still frequently used to this day.
Improve your skills
These days we are surrounded by animation in one form or another, be this film, television or more traditional methods. So with animation all around us, how do you as an animator stand out from the crowd and improve your own skills?
What follows are 15 tips to improve your character animation. Although some of these are aimed at 3D animation, most can also be applied to other, more physical genres too.
01. Observe real-life characters
Breathing life into a once inanimate object may seem a simple task, yet it's those subtle nuances that can help to portray emotion and give a true feeling of thought and consideration behind each movement.
Observing people, how they interact, how they express themselves and even how they move around is essential in helping you gain a good understanding, not only of motion but also timing and weight. Why not take some time to go out, grab a coffee and observe the world around you? (You're not skipping work - it's research!)
02. Study the psychology of movement
To truly mimic someone you must first understand their movements, not only the process of motion but also in intention. I'm not suggesting you drop everything and enrol at your local university, but instead do a little research.
Everything we do has a purpose, and the way we pose and hold ourselves can speak volumes. Understanding the thought processes behind why we do what we do, and when, will help you to share this through your animation.
03. Seek out real-world references

When animating the face it's essential to have something solid to refer to. When working with voiceover artists, most of the top animation studios will record them as they lay down the audio for their characters. This video is then passed to an animator to refer to as they work, allowing them to capture the actors' expressions as they speak and emote.
If this isn't an option then why not use your own face as reference? Grab a mirror and repeat the words, or even just recreate key expressions to give you a good starting point to work from.
04. Film yourself
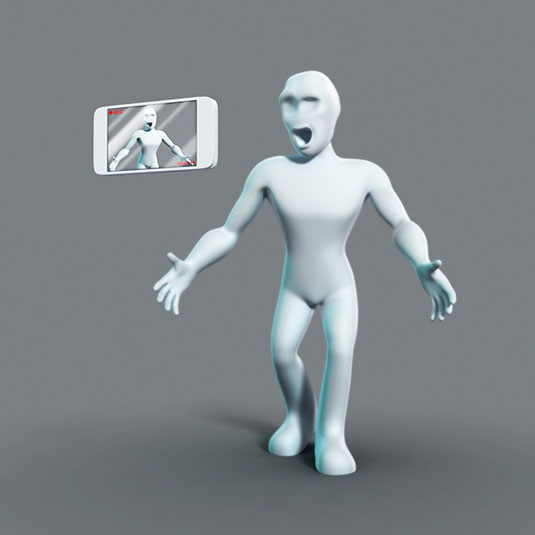
You can never get a good feel for the way a certain animation should play out while sitting at a desk, and online references can only get you so far. To understand how and why a character should move the way they do, why not record yourself performing that action?
We all have access to video cameras these days, in fact most of us have them in our pockets. So instead of just using your phones for selfies and Facebook, why not get out of your seat and record yourself in action?
Act out the scene yourself, and no matter how rough and embarrassing it may seem, this recording will give you an essential starting block to then work on top of. Being able to pause, rewind and review it in slow motion ensures you will capture all the subtleties that would otherwise be missed.
05. Keep your rig simple
Animating successfully in 3D isn't just down to the talent of the animator. Most of what they can achieve relies heavily on the rig they are using. A quick and generic system will give you the main tools to use, but to give your character that edge, the rig needs to be tailored to the animator's specific needs.
An unprofessional rig can also add to the animator's workload. If much of the underlying mechanics and systems are easily accessible they could accidentally be edited, resulting in a broken rig.
The best rigs are the ones which leave the animator to animate. They simply pick up the character and move them around without any complicated systems to contend with, or constant trips to the technical artist because the jaw is suddenly at the other side of the scene and they don't know why.
06. Form key poses first
Seeing a pile of polygons or clay suddenly come to life and show emotion is truly rewarding, but that doesn't mean you need to rush ahead and focus on each pose in detail, refining it before you move onto the next. Working on one small area at a time will mean you're not seeing the bigger picture and this can result in the sequence not being as fluid or natural as it should be.
Following a layering system ensures you are not wasting precious time. The first layer should be quick poses at specific frames, to get a sense of timing. Then once you've nailed those you can go through and repeat the process, adding more and more detail with each new pass.
07. Lead with the eyes
If you watch people as they go about their daily lives (not in a stalker-type way, but just in passing), you will notice that with each purposeful movement comes a specific sequence.
First the eyes move to where they want to go, and then the head follows and then the neck. This continues down the body until they eventually move to where their focus was drawn.
The eyes are what we're drawn to the most when we look at someone, and in most cases they are also the first thing to move before the rest of the body.
08. Study the effects of gravity
Gravity effects everything, unless you're in space. As we age, we are in a constant struggle to stay upright, which is never more noticeable than through our loose, wobbly bits. It's this gravitational pull, combined with our own physical mass which is crucial to capture in every movement.
Walking for example, is a simple movement - but much of how we move is dictated by our own physical build. If you are tall and thin then you may be lighter on your feet whereas someone with a fuller figure will have a heavier foot fall, with their waist dipping more as they then try to raise their upper body.
This may seem like an obvious tip, but it's an important one. Remember to give weight to your animation.
09. Time your character's movements
The world is governed by time. Even though our days are different we all move to the sound of the same clock. Where animation is concerned, this time is in your control. Yet use it irresponsibly and the results can be difficult to read, and end up giving the viewer the wrong impression.
Happier, more joyful movements are usually quick and sharp; this is why they work well in cartoons. They can also help to add exaggeration to a movement, and also add emphasis as the hero draws back slowly to power up the punch, which is over in a flash.
Slower movements can mean the opposite, and are often used to show the character is feeling down, or upset.
10. Keep your character balanced
One of the first things we learn as children is how to climb onto our feet and take our first steps. To do this is no easy feat as it takes strength and most importantly, balance. With each step you learn to shift your centre of gravity to ensure you don't fall. The centre of gravity is an important element to bring into animation too.
Try standing with your feet apart and lift your right leg off the floor, but do this while keeping your waist still. It's difficult to resist the urge to move your waist over your left foot, to keep you from falling.
When you do this you are shifting your centre of gravity to maintain balance. And of course, if you have to do it in real life you'll need make sure your characters do it too.
11. Recycle basic animations

This particular tip only really works when animating in the virtual world, but it's important to save basic animations, and keep a healthy stock of them at the ready.
Even if it's a basic walk or run cycle, you can bring it into a scene when working on a new character and give yourself a head start.
Once you have this base movement applied, with all the main poses and keyframes in place, you can then dedicate more time to adjusting the timing, weight and style to suit the personality of that particular character.
12. Use a basic model
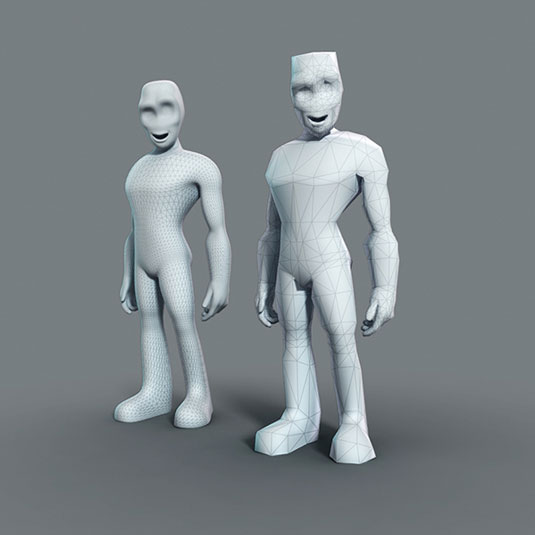
Manipulating a high resolution model in the viewport can end up causing a strain on your system, especially when the model needs to deform and move with a skeleton or other complex deformers. This is more noticeable when you attempt to play the animation in real time and discover you are only seeing every tenth frame.
When working with the overall motion of your character, hide the high resolution model and instead animate with a much simpler proxy model.
This could be a reduced version of the character, or even a few boxes scaled to loosely fit the proportions, but this version will allow you to fluidly work on the main areas of movement before you then bring back the high detail model for the finer detail work.
13. Anticipation, action, reaction
When you break down every major movement it can be split into three main areas - Anticipation, Action, and Reaction. If we take a simple leap as an example, the character bends first to build up power, this is the Anticipation. The leap itself is the Action and then the landing, with momentum pushing them forward is the Reaction.
This principle works with many movements, like throwing a punch or swinging a bat. It can also be used on facial animation, and even exaggerated for a more comic effect.
14. Offset your keys
Achieving the natural flow of an element dragging behind your character, like a tail, can be tricky. The root remains fixed to the pelvis but the motion then has to follow through to the tip like a wave.
A quick way to achieve this movement is to animate the base, and then copy this animation to the rest of the joints. Initially this will give them all the same action, but you can then go in and edit the key frames on each joint, shifting them forward a frame or two.
This essentially delays that initial action on the higher joints, giving you the wave like motion.
15. Don't form every letter in speech
When animating the face, and in particular the mouth, it's a good idea to try not to include each and every letter of the word the character is saying. This can make the mouth move too quickly, and often give an erratic appearance.
If you observe people as they speak you will see that their lips don't physically form each letter, instead what you get is a more general and organic movement flowing through the sentence.
Take a simple 'Hello' for example. If you mouth this greeting while looking in a mirror you will see that your lips form more of a H-E-O, with the tongue making a brief appearance to make the L sound.
More from Ant at Vertex
Ant Ward will be at Vertex (opens in new tab) answering your questions, as part of our 'Ask an Artist' section. These sessions are a fantastic opportunity to get one to one with a veteran artist, who can help you overcome a road block in your work, or to talk through a problem area.
Ant is an artist with huge experience in many areas of CG. He has been a regular on the pages of 3D World for many years and has written numerous tutorials, as well as being a part of our expert Q and A team.
To book a ticket for Vertex 2018 head over to the Vertex site (opens in new tab) , where you will find information on all the day's activities, from keynote talks to the panel discussion and recruitment fair.
Related articles
- The ethics of digital humans (opens in new tab)
- The mocap behind Justice League's Steppenwolf (opens in new tab)
- Scott Ross to talk at Vertex (opens in new tab)

Thank you for reading 5 articles this month* Join now for unlimited access
Enjoy your first month for just £1 / $1 / €1
*Read 5 free articles per month without a subscription
Join now for unlimited access
Try first month for just £1 / $1 / €1
Related articles
Source: https://www.creativebloq.com/news/bring-your-sketches-to-life-with-these-animation-courses
0 Response to "How to Draw a Easy Obstacle Course"
Enviar um comentário